16 RV photography tips to get your RV noticed
Inspirational RV tours are the heart of what we do here at Love That RV. We love seeing the creative ways that people renovate outdated RVs and turn them into beautiful, livable spaces.
And our readers and social media followers love to see those remodeled spaces, too!
We’re honored that you’ve chosen to share your personal space with us, whether you’re looking to sell your RV, you rent that RV, or you just want to share your hard work with like-minded RV owners.
The good news is that you DO NOT have to be a professional photographer to submit your RV photos for us to share on our website, marketplace listings or social media posts.
After years of buying, selling and showing off RVs, we share some tips in the article below for capturing your RV’s style in its best light.
When it comes to photographing your RV, there are several things you should do every time; and there are also a few things you should NOT do. So let’s get started…
Article summary
This is a long guide, so if you just skim the headlines, here’s what the cool kids call a TL;DR (too long, didn’t read) summary.
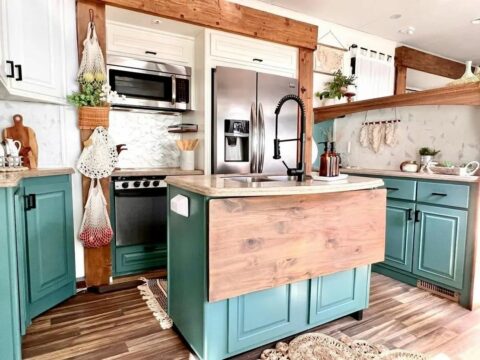
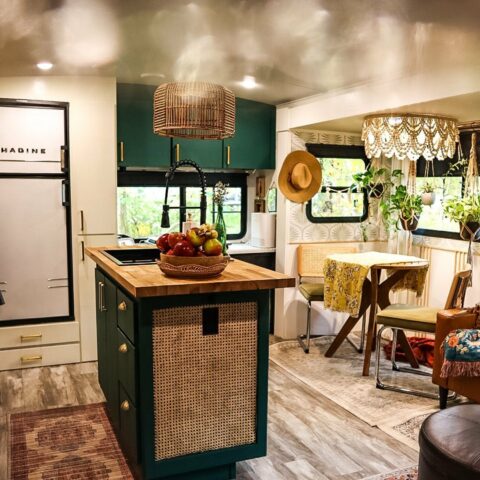
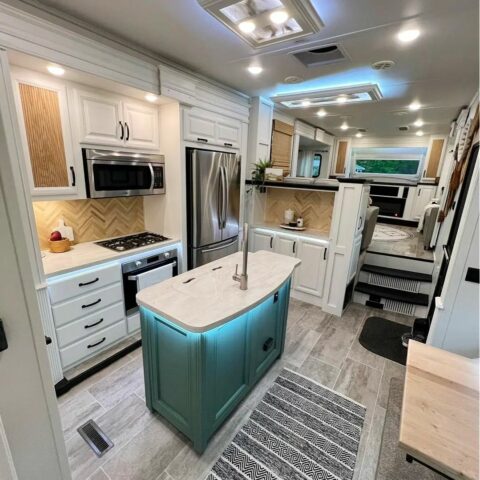
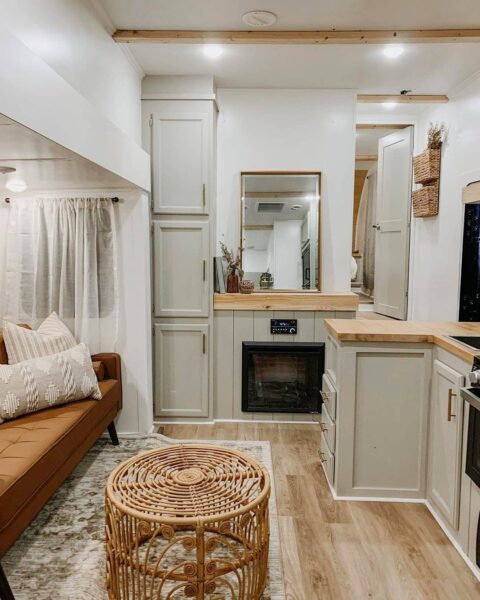
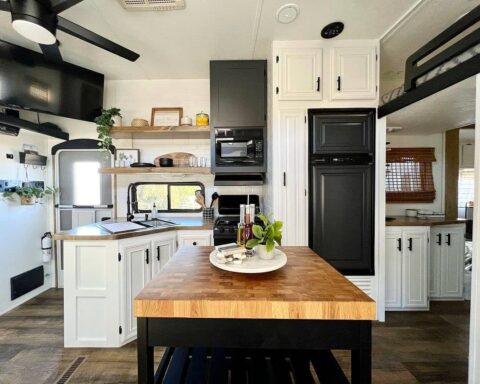
1. Get the money shot
People love to see dramatic renovation changes, and no place in the RV is better to photograph than the kitchen.
2. Use natural light
Avoid direct sunlight washing out the space with bright light. Take photos during the morning or late afternoon light.
3. Clean your camera lens
An easy thing to forget, but don’t let a smudge ruin your photos.
4. Hide clutter
RV life is often associated with minimalism, so remove everything except the basics during the photo shoot.
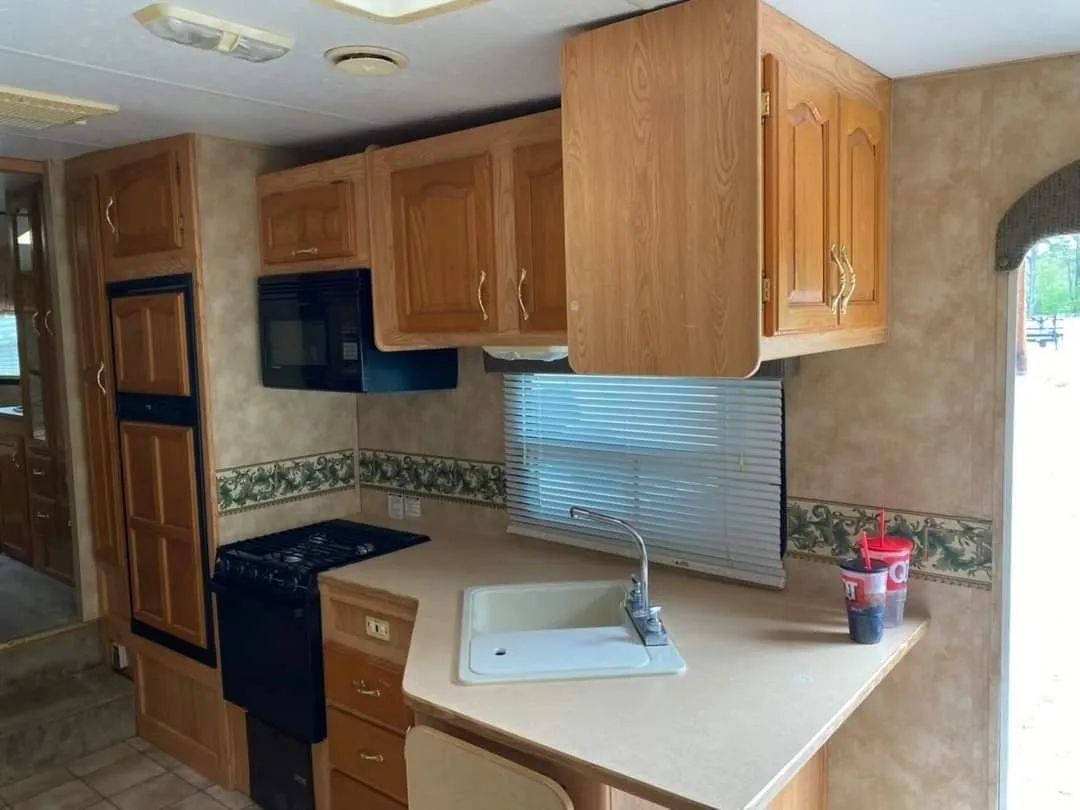
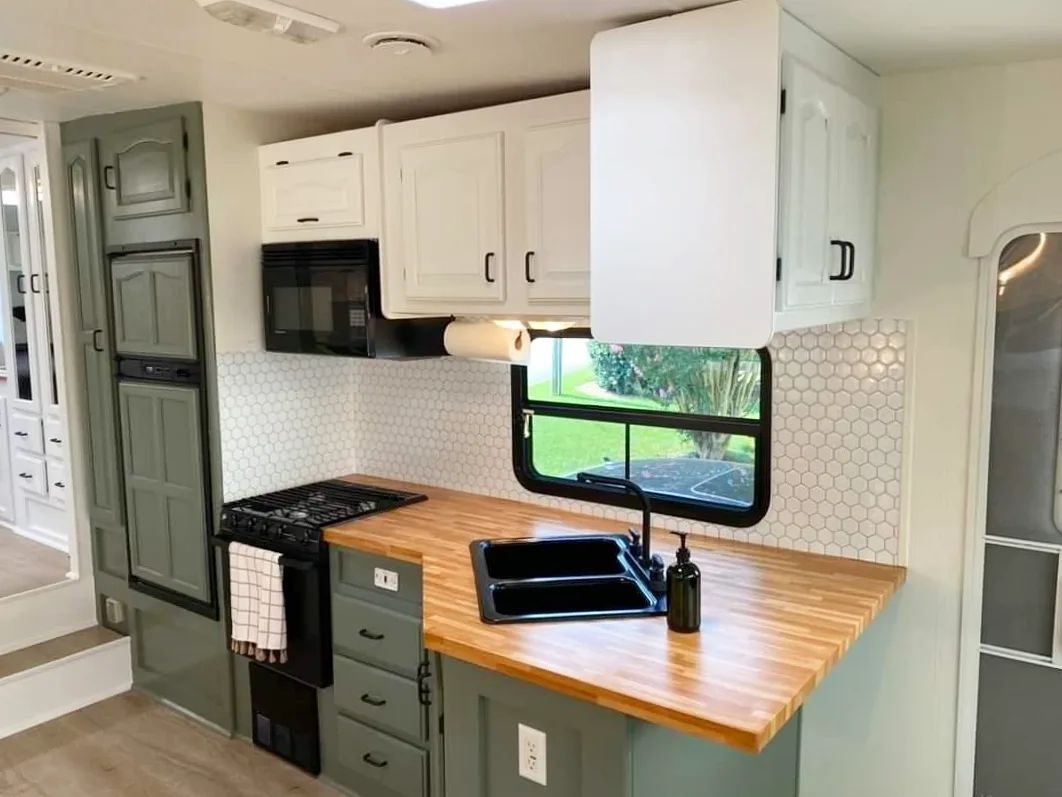
5. Match before and after pictures
Plan ahead before you photograph your makeover so you can show off the transformation.
6. Remove material that is offensive, personal or copyrighted
Personality is good, but if you’re trying to sell or rent your RV, try not to scare people away.
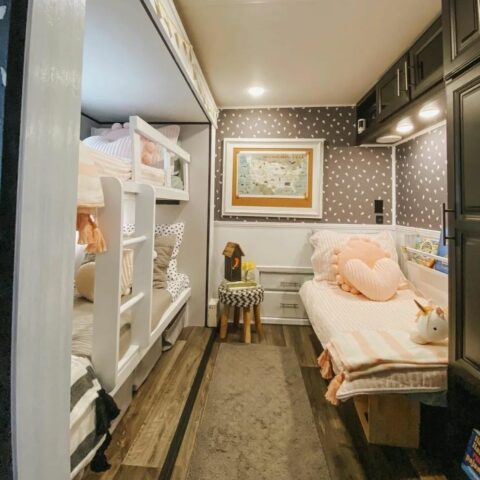
7. Show off the details
People want to envision where they would store their stuff if buying your RV, so show them the cabinets and closets.
8. Avoid fisheye and super wide angle shots
Small spaces likely require some wide angle shots to capture the space, but going too wide can cause distortion and weirdness on the edges of the photos.
9. Use a tripod or solid surface
The best way to keep photos from being blurry is to use a tripod.
10. Check vertical alignment
You can crop and rotate photos after the photo shoot, but it’s easier to avoid edits by making sure your camera lines up with the walls and ceiling.
11. No watermarks or screenshots
Don’t look amateur. If you follow all these tips, your photos will look amazing. Don’t ruin the presentation with watermarks.
12. Clear out pets and kids
Pets and kids are cute, but the purpose of the photo shoot is to show off your hard work that went into the renovation.
13. Avoid selfies and reflections
Try to angle the camera in a way that you can’t see it in the mirror or other reflective surfaces like a TV.
14. Focus perspective
Make sure the lens is focused on the interior of the RV and not looking longingly out to the beautiful campground outside. Take photos from an angle where the viewer can get a sneak peek around the corner. That draws them into the tour.
15. A little staging helps
Turn your RV from everyday normal to a magazine show stopper with a little décor and organization.
16. Use photo editing tools
Follow the tips in this article and you won’t have to spend a lot of time editing. But some simple crops and color correction edits can help your photos really stand out. Use these free and inexpensive photo editing tools.
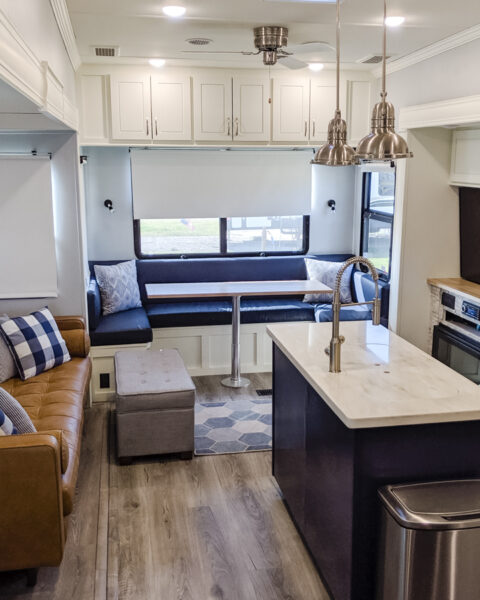
1. Get the money shot
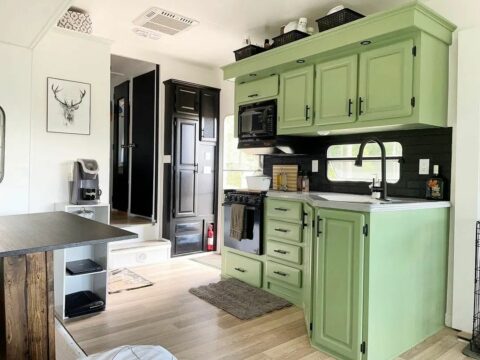
Where’s the space you’re most proud of inside your renovated RV? For most RV projects, the most dramatic before and after makeover is the kitchen area.
Kitchens are notoriously dark because manufacturers use brown cabinets. We’ve seen many renovations that successfully refurbish their original brown stain on the cabinets, but the majority of renovations change the appearance in the kitchen by painting or otherwise staining cabinets.
It’s a lot of work to pain cabinets—we know, we’ve done it several times ourselves! Which means it’s often the most impressive space to show off if you took the time to change the cabinet color.
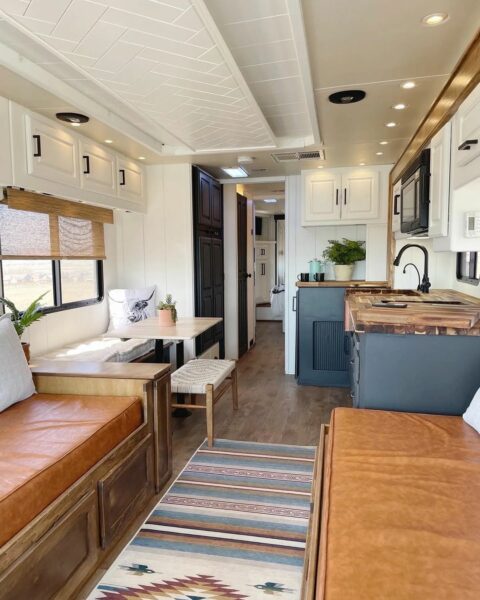
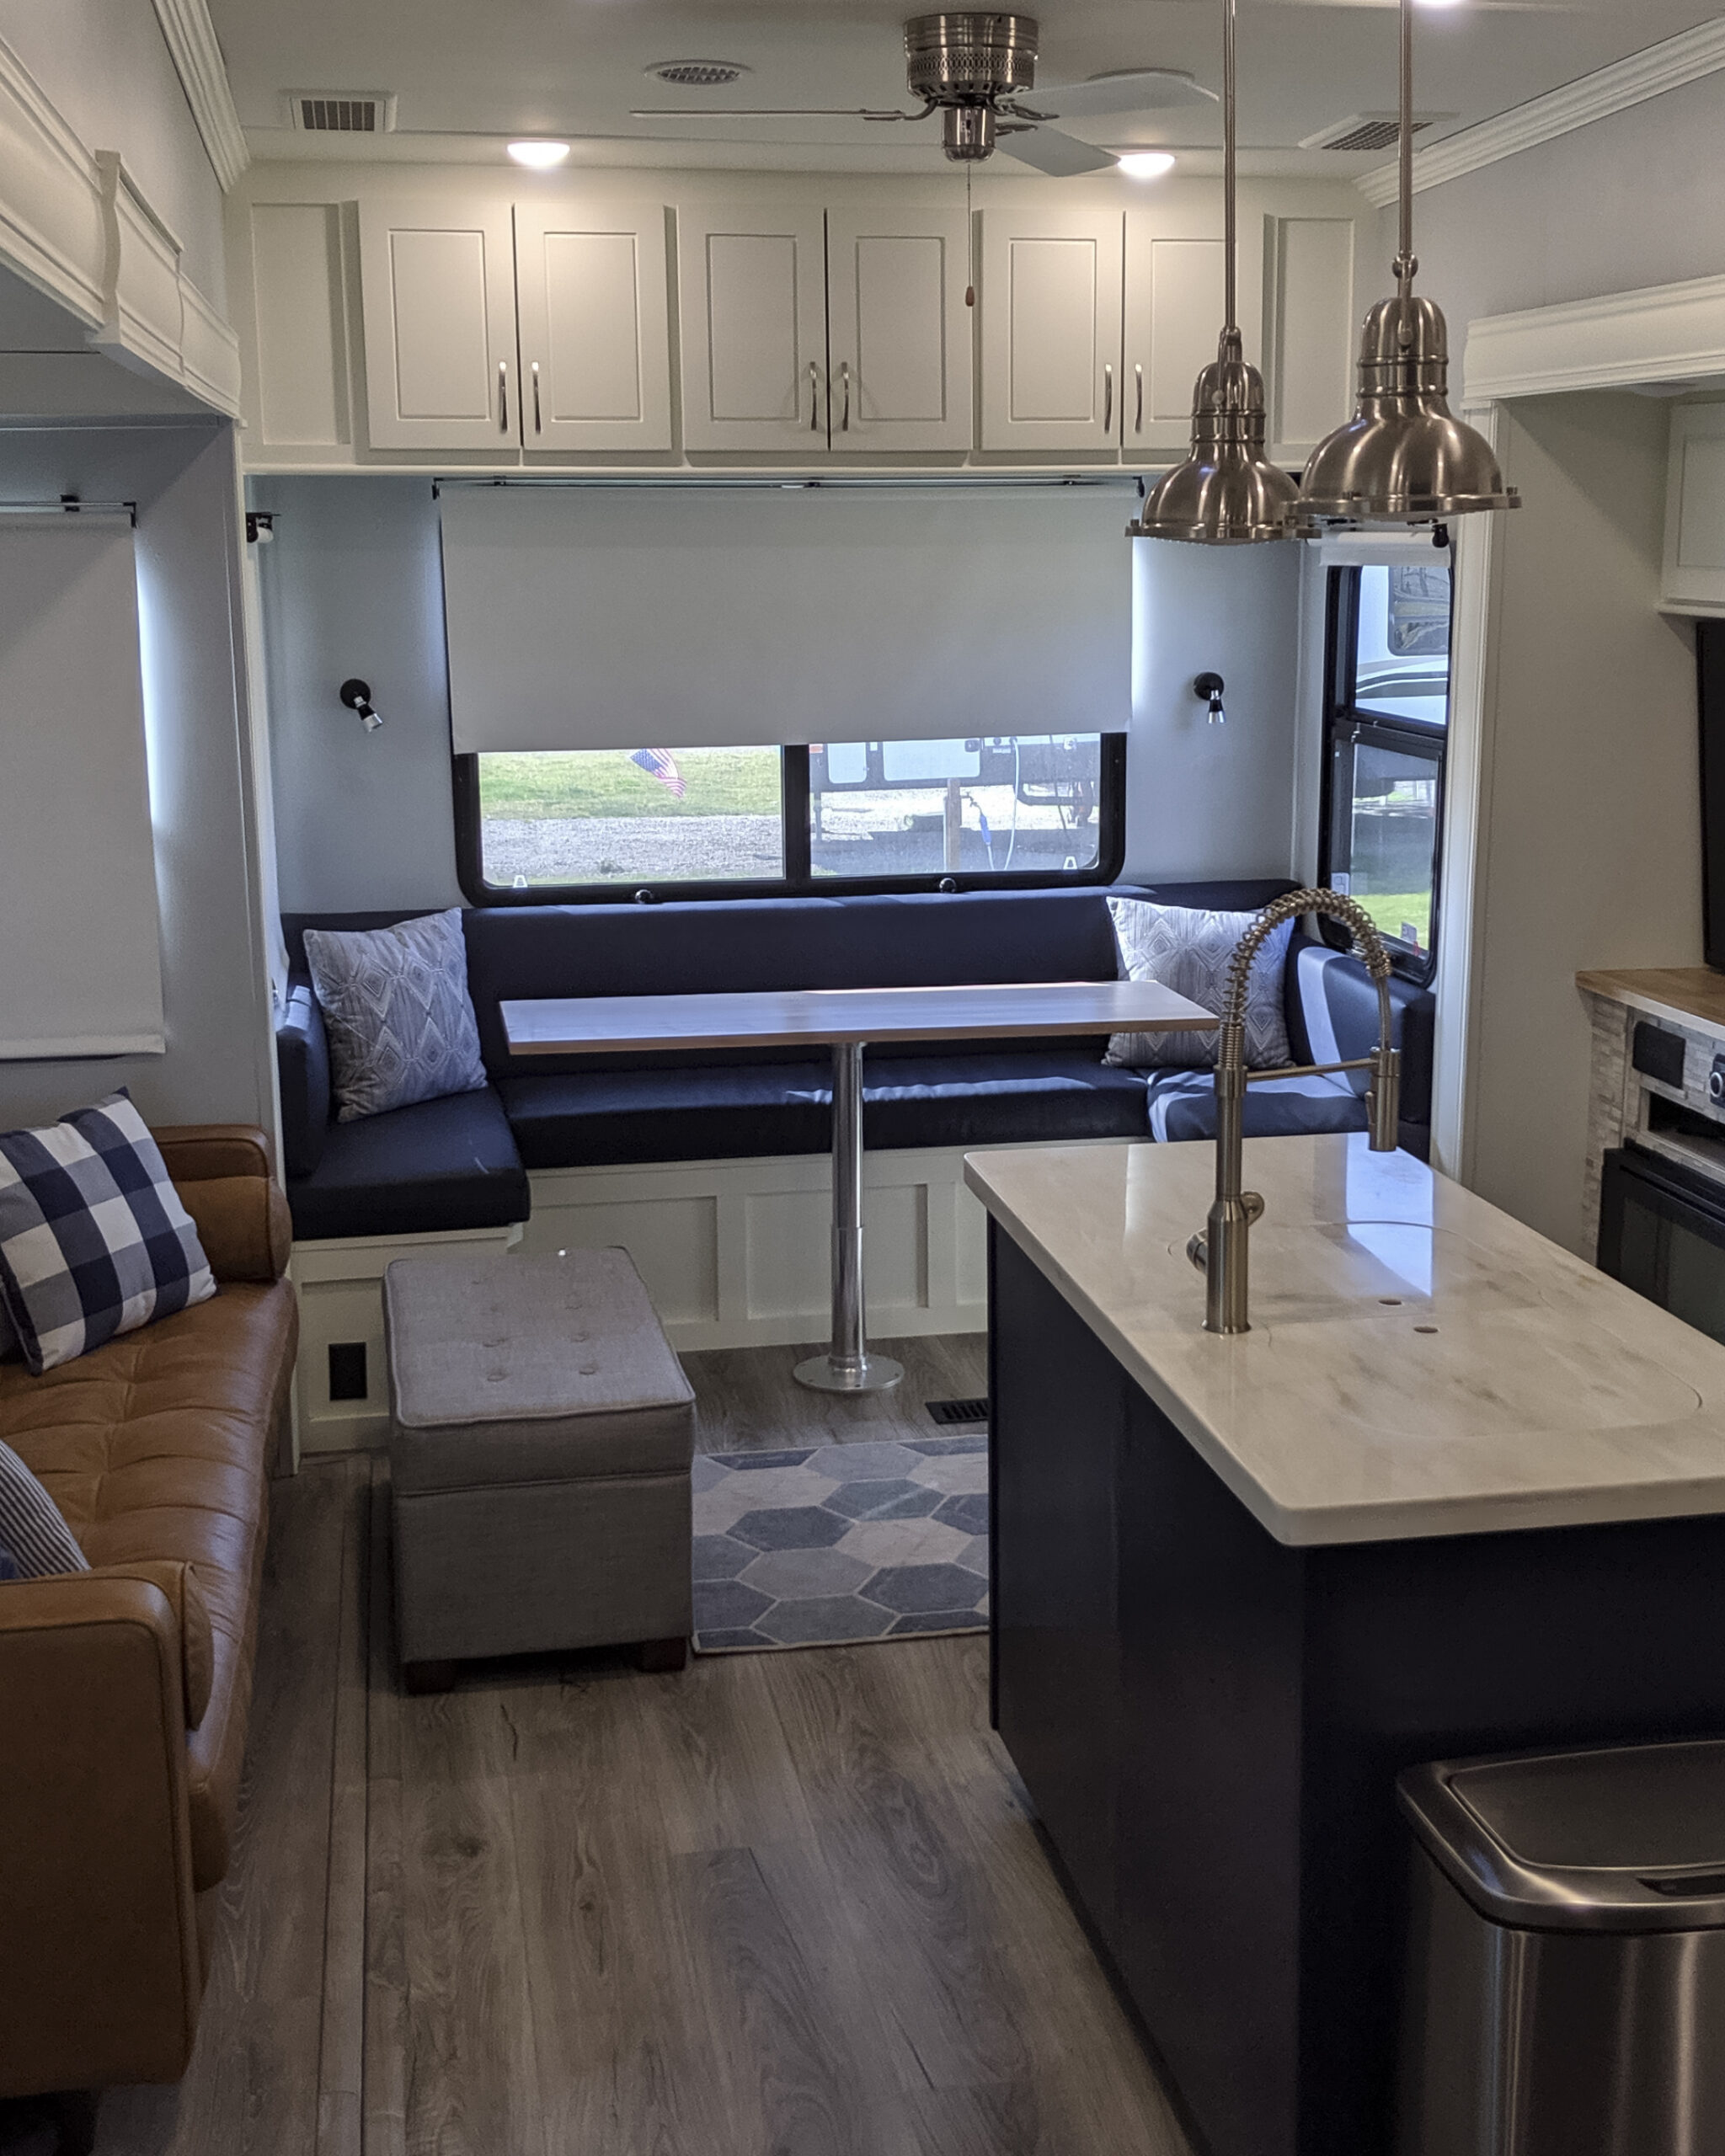
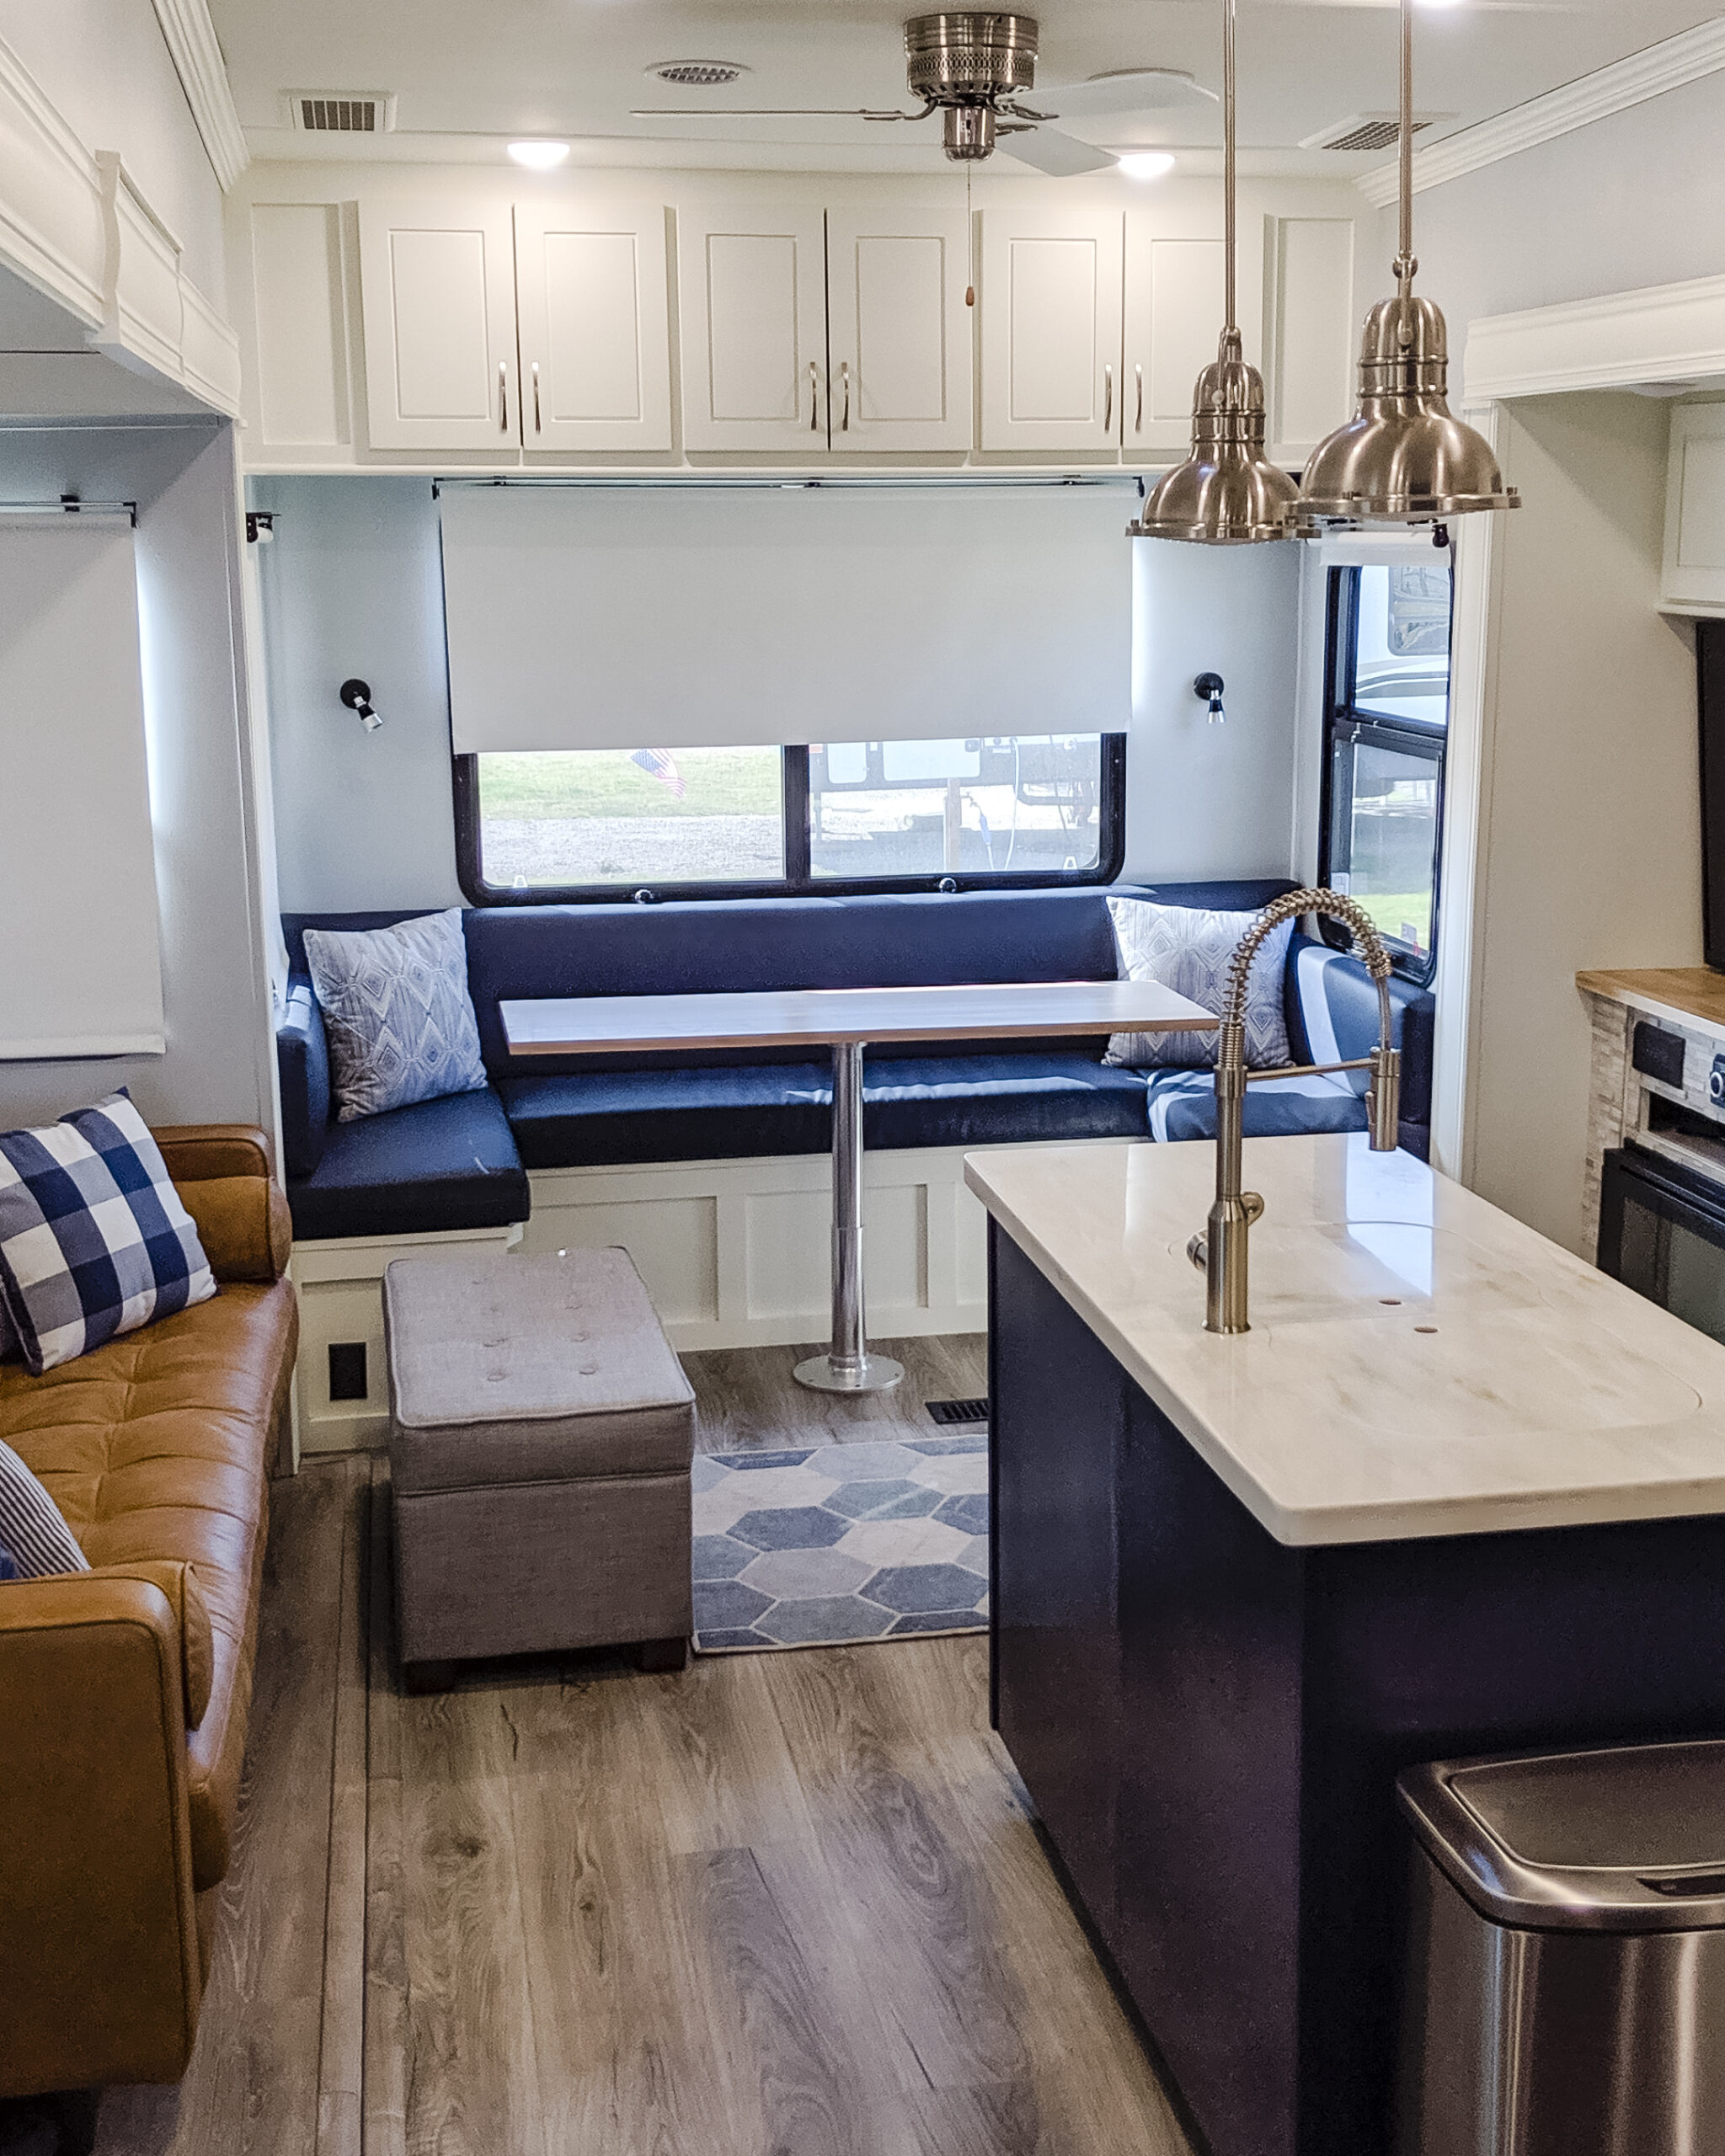
Kitchens are also generally the heart of the RV. Most RV floorplans focus around the kitchen so it’s usually the largest space often with taller ceilings. Many RVs (especially larger motorhomes and 5th wheels) have slide-outs opposite of the kitchen that expand the space even more with a couch and table.
All that to say… you generally spend the most time inside your RV either sitting or standing in the kitchen, so most RV owners want to feel comfortable in that space and want to see what that space looks like in other people’s RVs.
Take photos from multiple angles. Try positioning the camera centered looking straight at the space. Then move left a couple steps and angle slightly to one wall. Then switch to focus on the other side.
Don’t skimp on taking lots of photos and videos of this space. Try to stand in far corners and get a long shot that shows as much of the space as possible. If you can get the full space shot with cabinets, fridge, sink, island, table and couches all in the same shot, that’s considered the money shot.
Out of all the photos and videos we’ve shared over the years of beautiful RVs, the kitchen space is by far the most popular and most shared space, especially if it’s connected to a living or dining space. That generally makes it the largest space in an RV.
2. Use natural light
Bad lighting, either too bright or too dark, will ruin your photos.
Your shots will look best when you take the photos or videos with natural light filling the space. Luckily most RVs come with an abundance of windows (not a benefit if you’re staying in a crowded RV park at night, but that’s a story for another day 🙂 )
Try photographing your RV during early morning hours or late afternoon. The lighting is usually softer and not as bright during those hours.
While natural light is key, you want to avoid flooding too much direct sunlight to the point where you’re creating sun rays or bright pools of light on surfaces inside the RV. This creates harsh contrasts between things that are lit and the rest of the space in the shadows.
Some of that bright, direct light can be avoided by taking photos at a different time of day. You can also play with opening or closing blinds or sheer curtains to filter sunlight if it’s too bright.
You can even open the door to pull in more light. Toy haulers have the biggest advantage that they can open the entire rear patio door to get all the natural light they want.
If the lighting is still too bright, you may need to park your RV in a different orientation where the sunlight doesn’t shine directly in the windows.
Turn off or use a dimmer on overhead lights and lamps. RV lights are generally bright LED lights that tend to cause unwanted glare in photos. Many of the best renovation photos we’ve seen don’t have overhead LED lights on because there prepped the shot with sufficient natural sunlight to fill the space.
You might be parked at the beach or in a beautiful mountain setting that you want to show off, but the focus of your interior shots should be on the interior renovations, not the scene outside the windows.
Whether you’re using a DSLR camera or just a cellphone, when you adjust the depth of focus to an object on the interior of your RV, that scenery outside the windows will wash out a bit and become unfocused. That’s okay because you’re showing off the renovation, not your camping spot.
Never use flash with interior shots. RVs have a lot of reflective surfaces like the windows, appliances, and even the vinyl flooring. Flash is typically a harsh white light and will create an unnatural looking surface in your photos. If the room is too dark and you feel it necessary to use flash, try waiting until a day when the natural lighting is a little brighter. If the room is still too dark, try adding some lamps or other soft lighting.
Take all your photos around the same time of day, even if you split the photo shoot across multiple days. If you’re editing your photos and notice you missed something or want to re-take some shots, try to take photos around the same time the next day with the same ambient lighting. When scrolling through photos of an RV renovation, it looks out of place when all the photos have nice, clean lighting and then the last photo clearly has different color temperature.
If your space doesn’t have sufficient windows and the photos still appear dark, you can try using a DSLR camera on a tripod and leave your shutter open longer to get brighter shots.
If your photos are still appearing too dark after following these tips, you can use photo editing tools like the free Adobe Lightroom app to make some minor adjustments. We cover photo editing tips a little later in this article.
3. Clean your camera lens
This may be the easiest tip, but we often forget this step… use a microfiber rag to gently wipe away smudge or dirt from your camera lens before taking photos.
This is especially important if you’re using your cellphone because you hold the phone in your hands all the time. You likely have a fingerprint covering part of the camera lens.
Sometimes it’s hard to see smudges on a small screen so you might not notice those unwanted spots until you open the photos on a larger computer screen to edit.
It can be incredibly frustrating to finish up a photo shoot and then notice that all the pictures had a blemish in the corner because of a smudge on the camera lens.
Finally, be careful not to hold a finger in front of the lens. It’s common on a cellphone for the edge of a thumb to show in the bottom corner of the phone. We’ve all had that happen… where we hand our phone to a fellow tourist and ask them to take a photo of our family only to find out that they held your phone weird and left their finger in front of the camera 😂
Using a tripod can help eliminate any fingers accidentally getting into your shot.
4. Hide clutter
If you live in your RV full-time, you know this next tip very well… a small space can look messy with just a few things out of place.
Some dishes in the sink, a couple toys on the floor, and a blanket unfolded on the couch… it can look like a tornado ripped through your RV! And yet it only takes a few minutes to clean the clutter and your space is ready to photograph.
Part of the alure of traveling or living in an RV is that the RV lifestyle is relatively minimalistic. If you’re traveling full-time in your RV, especially if you have children on board, you likely have stuff that just doesn’t have a neat, tidy spot where you can put it all away. Storage space is always limited so things sit out to be accessible.
But when you’re taking photos and want to appear your best, you want to de-clutter as much as possible. Be intentional about organizing things in your photos.
Clutter hotspots often include the kitchen counter, the tops of the bedroom cabinets, the bathroom countertop, and the closets. Those are sometimes the only place to store everyday items, but unless an item is absolutely necessary or it’s used as part of the décor, it might be best to simply store the items out of view before taking photos.
Move daily objects out of the way for the shot. This includes shoes by the doorway, kitchen utensils or coffee makers on the countertop, alarm clocks on the bedroom table, or even extra pillows. Clutter not only makes a space feel messy, it can also make that space feel smaller. You did a lot of work renovating the space to look beautiful so make sure you show off the beautiful space rather than all the stuff in the way.
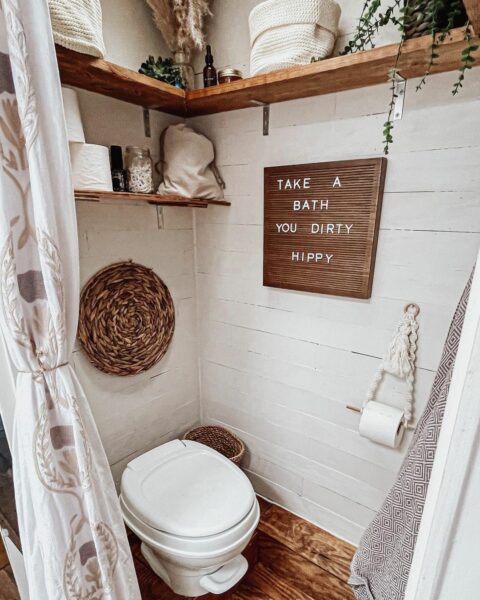
Pay special attention to the bathrooms. Close the toilet lid, remove toiletries from the shower, hide towels away, and put the toothbrushes away.
Turn off TVs, computer screens or other digital screens that might be displayed in your shots. If there are wires or cables visible, try stuffing them out of the way or simply unplugging them so the space looks tidy.
And last, but not least, listen to your mother’s advice and “make your bed!” Pull the sheets tight and smooth out any creases in your bedding. Prop up the pillows and do the pillow chop.
It sounds like a lot, but luckily most RVs are very small. So a few minutes of preparation to improve the photos of your RV should go a long way when you’re trying to show off to potential buyers or renters.
Want to feature your renovation?
If you want to submit a renovation project to be featured on Love That RV, fill out the 🔗Inspiration Submission form.
5. Match before and after pictures
Hopefully you stumbled on this guide before you started the renovations and the dust started flying. It can be hard to remember to do when you’re excited to start demolition, but do your best to document the renovation process.
Not only is it fun to create and share content that shows the renovation in progress, it’s a great idea to document everything for your own benefit. You might need the extra motivation when it’s late at night during the renovation and you’re feeling like you’ll never reach the finish line. And it’s fun to share the photos with your friends around the campfire.
Some people rely on the manufacturer or dealer photos as their “before” shots when showing a before and after look at their renovation, but those photos are likely copyrighted and they’re not as convincing or exciting as your own planned shots.
You likely have a plan for what the final product will look like so you can plan your camera angles that will show off your big plans and the final makeover. The best before and after shots are shown from the same angle and frame everything in the room in the same way so that readers can compare the space and clearly see the changes.
6. Remove material that is offensive, personal or copyrighted
A little personality is good. That’s what makes it fun to scroll through the thousands of pictures of renovated RVs on this website and on social media feeds. But the line between fun design and personal taste can be pretty thin at times.
If you’re trying to sell or rent your RV, you might want to take down quotes or artwork that some people might view as offensive before taking photos.
As proud parents ourselves, we love seeing photos of cute kids adventuring and having fun, but we ask that you try to not submit photos of spaces that have closeups of personal photographs, particularly of children.
While you’re at it, you might want to question if you want to keep photographs on the walls that show your Spring Break party weekend or a night out on the town. The focus of your RV photos should be on the space, not the people who own the RV.
Put aside or cover up anything that shows names, addresses, phone numbers or other personal identification. Some people try to blur that information in photo editing software, but that just looks distracting and turns the viewer’s attention to that area trying to figure out what you are blurring.
We also ask that submissions try to not include photos that feature images of celebrities or other copyrighted material. We review all photos submitted for submissions (whether it’s a simple social share or a marketplace listing) and we will deny submissions that include copyrighted material.
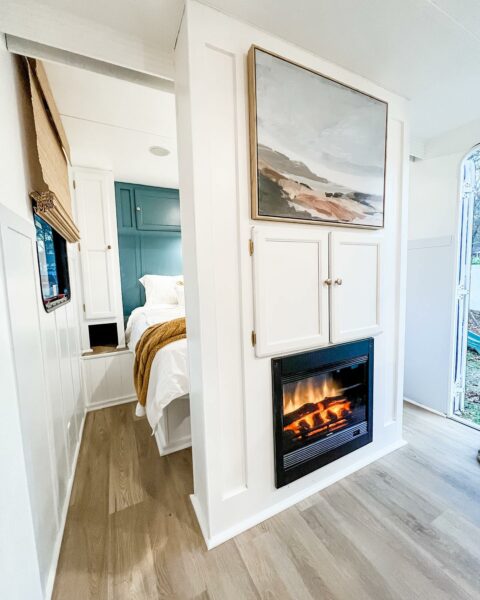
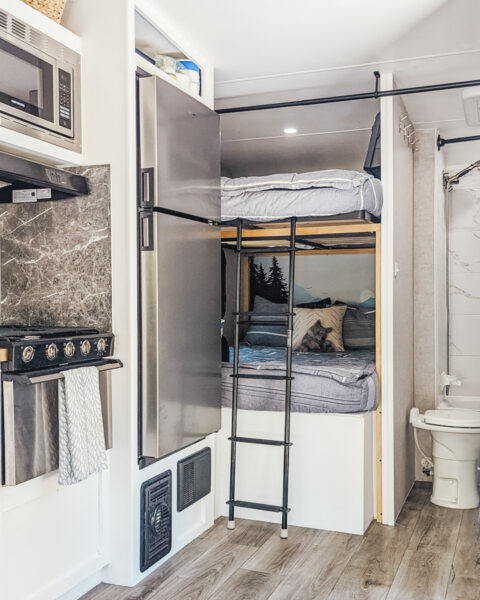
7. Show off the details
While your money shot (typically the kitchen) shows as much of the room as possible in a single shot, you still want to share the story behind the details that go into the design. The little things like appliances, sink faucets, cabinet pulls, or even décor show the attention to detail that went into the renovation. All the details make the space unique and sets it apart from mass-produced cookie cutter RVs on the market.
If there are particular design aspects like an accent wall, cute wallpaper or new counter tops that you put into your renovation, be sure to take close up shots.
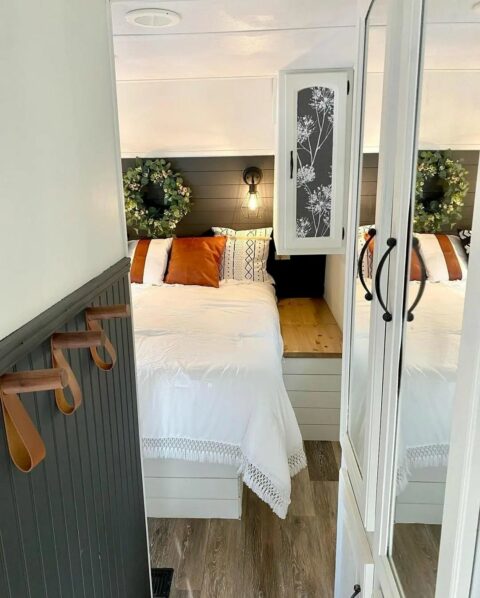
Upgrades in the bedroom like a comfy mattress on the bed, our favorite Beddy’s bedding (use the code LOVETHATRV for 15% off), or a custom headboard are good callouts.
Unique storage features are good to share as well. If your RV comes with shoe storage in the stairs or a sliding spice cabinet in the kitchen or pantry shelves, take photos and videos and share those details. Something you might find boring like the inside of a cupboard or a closet could be something very interesting for a buyer figuring out where they might store their stuff.
Take close-up photos of the RV electrical systems, particularly the main panels where an RV owner would open and close slide-outs, retract awnings, see how full the storage tanks are, see generator fuel consumption, or other components relevant to your RV model.
And of course, be sure to show off the appliances. Did you add a residential or 12v fridge? Does it come with a wine cooler? Washer and dryer? Or maybe you swapped the old stove for a convection cooktop? It’s not that different from shopping in a sticks-and-bricks residential home. People want to see updated kitchens, so focus your photography on those key appliances.
The best-performing listings in our marketplace often have lots of photos, while listings that only have a few quickly-snapped shots might not do as well against their better-photographed competitors. Be especially careful to include anything that makes your RV stand out, whether it’s a unique feature (say, a wine cooler or a washing machine), or the fun design that went into your renovation.
8. Avoid fisheye and super wide angle shots
Avoid fisheye lenses if possible (like many GoPro types of cameras). The edges of the photo can look distorted and out of focus when you stretch the shot.
If you’re trying to sell the RV, distortion or stretched parts of the photo can make it challenging for prospective buyers to get a realistic feel for how their stuff might fit in certain spaces.
More than once we’ve shopped for an RV on a dealer’s website and thought a cabinet or countertop would be bigger than it actually was when we walked through the RV at the lot. RV dealers and manufacturers notoriously try to make the RV look bigger than it really is so you’ll often see their marketing literature with unrealistic photos.
Because RVs are small, you might have to use a wide angle lens to capture enough of the space to make the photo interesting.
Many modern cellphones have wide angle lenses that you can use to capture some great shots. Just pay attention to the edges of the photo. Sometimes if you zoom out too far on a cellphone, you get a stretched, unrealistic shot around the edges.
RVs are small so even with a good camera, you might have to back around a hallway or out the door to get far enough back to capture the whole room in the shot.
Capture several photos in each spot just in case one or more of the shots ends up being a bit distorted, slanted or blurry. Sometimes the photo looks good on a small cellphone or camera screen, but when you open on a larger computer screen to edit the photos you see something you don’t like. It’s always easier to delete extra photos from an SD card or cellphone than to spend time trying to edit a photo after the fact or have to come back and try to replicate the shot again after you notice issues.
Review your photos on a larger laptop or desktop computer screen before uploading any photos. This allows you to make sure the images are clear even while in a larger resolution. And you might notice things like clutter, a finger, or issues you didn’t notice on a small screen.
9. Use a tripod or solid surface
A tripod helps avoid blurry photos, and it can help ensure your photos are aligned properly with the walls and the ceilings (discussed in the next tip below).
A tripod also helps you get the camera at a good, consistent height. You want most photos to be taken from the perspective of your eye height so that the viewer can get a feel for how your RV would look if they physically walked in the front door today.
It’s not a bad idea to take the photos of your larger areas (typically the kitchen and dining area) slightly higher than eye level so it looks down on the space and helps provide perspective of how big the space is. Ceilings in the main area are sometimes a little higher than the rest of the RV (especially in a 5th wheel or toy hauler) so this helps the viewer get a feel for how big the space feels.
Keep the camera pointed straight ahead at eye level. You don’t want it angled up where you’re seeing too much of the ceiling, and you don’t want to point down to the floor unless you’re trying to point out rugs or flooring that you upgraded.
Tripods or even a shelf let you set the camera in tight spots where you might not be able to fit. Use a timer or a remote shutter to get the shot you want.
Another advantage to tripods is that if you find a good spot to take your before shots prior to renovation, it’s easier to place the tripod in the same spot again and get the exact same “after” post-renovation shot.
10. Check vertical alignment
Using a tripod can help ensure your photos are straight up and down. If you’re taking vertical photos on a cellphone, line up the edges of the screen so they are parallel with the walls. Some cellphone camera apps even have grids that make it easy to line things up straight in your shot.
Any free editing software or even your basic photo app on your cellphone can straighten crooked photos after the fact, but if you take a little time when snapping photos to make sure everything is lined up, you’ll have less editing work later.
Take vertical and horizontal photos of every room and space in your RV. Some spaces are better viewed in a vertical orientation (like a small, narrow bathroom) while other spaces are better captured in horizontal orientation (like a kitchen with slide-outs).
You can always delete extra photos, so don’t be afraid to just keep rotating the camera and snapping shots.
You may have noticed that some social media channels like Instagram, Pinterest and TikTok actually prefer tall, vertical photos while other channels like Facebook and Twitter often show square or even horizontal photos.
Our marketplace listings here on LoveThatRV can accept any photo orientation, but depending on the reader’s device, the photos may be automatically resized or cropped to fit their device. Our featured image (the first image) for each listing is horizontal so keep that in mind if you’re taking a photo specifically for that featured spot or a social media post.
When uploading photos to a marketplace listing, don’t upload upside-down or sideways photos. People want to feel connected to your RV, so organize your photos in a logical order when uploading an album of photos.
11. No watermarks or screenshots
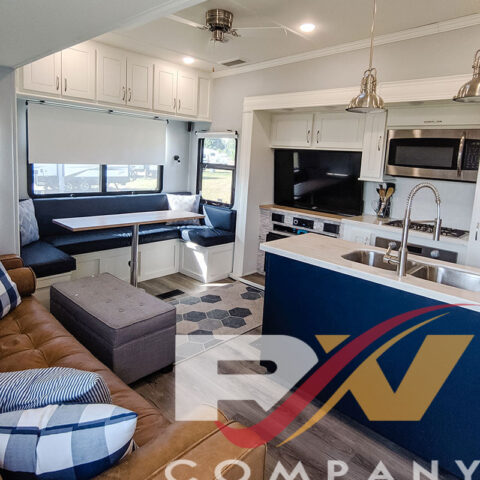
Don’t add watermarks to your photos. If you’re sharing your photos with LoveThatRV for distribution on either this website or on social media, there are other appropriate ways for advertising your name, username, or company name. Tags, mentions, and credit links are built into social tools and our website to correctly accompany each post and give credit where credit is due.
As mentioned in another tip, try not to use “before” photos of your RV from the dealer or manufacturer. First of all, those images are likely copyrighted. But they also often add watermarks for advertising purposes. Those watermark images are distracting when trying to view a picture and get inspired by the renovation work.
Don’t upload screenshots from your camera roll or Instagram feed. Not only are these photos low resolution, they also include unnecessary elements in the image like camera roll navigation, time, and phone battery levels that may confuse a user viewing the images, especially if they’re viewing those photos on a similar cellphone. Screenshots also make the post look amateur and distract from the inspirational nature of your beautiful renovation.
12. Clear out pets and kids
Furry friends are generally cute and fun, but if in doubt, leave them out of your photos. If you’re taking photos for a listing to sell your RV, you don’t know how potential buyers feel about pets. We never advise that you omit information or lie to buyers, so it should be disclosed that you have pets when selling an RV. The listing description should include details about any damage as a result from your cute puppy dog nipping at the cushions. But even if your pets are well mannered and haven’t caused any mishaps, keep the photos about the renovation and the décor, and don’t make the pets the focal point in the photos.
If you have children, ask the kids to play outside for a few minutes while you take photos. Speaking from experience, kids don’t generally sit still very long so you may end up with a blur in your photos as they move around. And like we discuss in an earlier tip, it’s a personal choice if you want to keep family photos on the wall but try not to include closeup shots of personal photographs.
Finally, while photos of you sipping hot chocolate with your feet up on the foot rest make for a nice social media post,
Remember that the point of photographing your renovation is to focus on the beautiful aspects of your remodeled space.
13. Avoid selfies and reflections
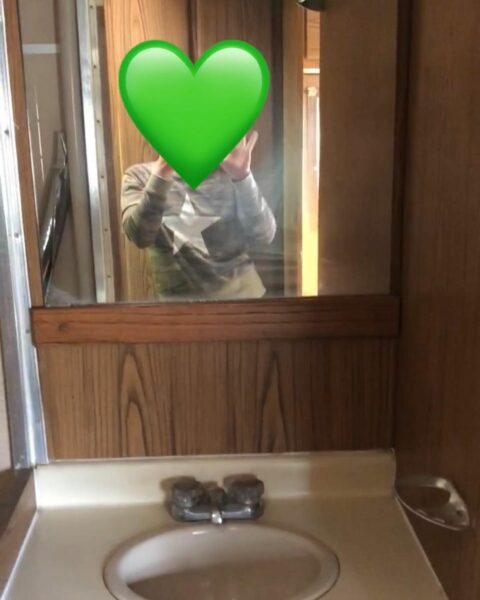
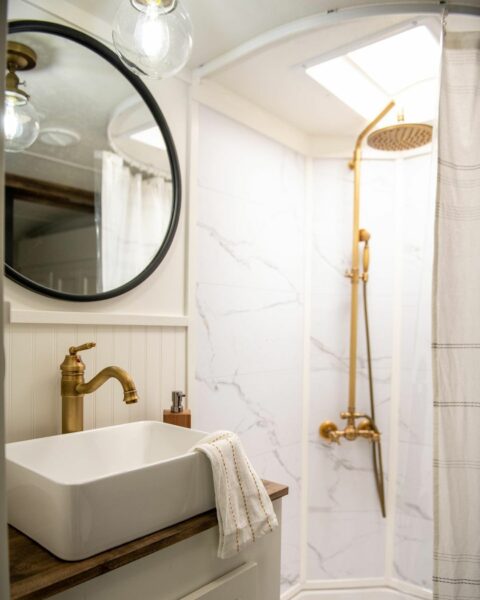
The toughest space to photograph in an RV is the bathroom. It’s tight and cramped and usually has a mirror. You might feel like contortionist bending or crawling on the floor to find an angle that shows off the space without the camera and photographer appearing in the mirror reflection, but it’s worth the effort.
A selfie standing in front of the mirror looks a bit amateur and doesn’t focus on the renovation.
The same goes for windows, microwaves, ovens or other shiny objects in the RV that might show a reflection.
We’ve seen more than a couple “oops” moments when people delete photos quickly after posting them when they take a closer look at the reflection and notice something they didn’t want to appear in the shot. Pay close attention when editing the photos after your photo shoot to make sure reflective surfaces don’t become the next Reddit front-page meme.
Remember that the focus of the shot is to showcase the beautiful renovation. People, cameras, or fingers holding a cellphone around the corner of a shot become a distraction for viewers.
Tripods and timers or remote shutter buttons make it easier to get into tight spots and angles where you might be unable to stand and hold a camera.
14. Focus perspective
All cameras and cellphones allow you to use a button or a finger press on your screen to indicate where you want the depth of focus to be. RVs are tricky to photograph because you often have a lot of windows letting in a lot of light. Camera lenses may try to focus outside the RV, then back to the interior, then back outside again.
Photos that lack focus don’t do your listing or photo album any favors. Not only will the viewer be unable to comprehend what they’re looking at, but the blurred photos also make you look unprofessional and lazy… which doesn’t necessarily say great things about your beautiful RV you spent so much time renovating!
So setup your camera on a tripod and select the part of the space you want in focus. The RV interior is what you’re generally trying to photograph, so you should select the cabinet, the couch or whatever object is halfway in between your camera and the windows to force the shot to focus on that object rather than something beyond where you’re looking.
You want people to feel like one space flows into the next space (kitchen to a hall to a bedroom, etc) so take photos from angles that give a peek around the corner. This can also help post engagement because it makes the photo sequence flow as the user continues to swipe through each photo wanting to see more of that sneak peek into the next room or space.
You might not upload all your photos in the first round of posting a listing or a social post, but a buyer or renter may later ask for more photos, so it’s nice to have everything on hand. It’s easy to delete extra photos so keep snapping more photos during your photo shoot! If you find out when editing your photos after your photo shoot that one of your angles was out of focus, at lest you’ll have more angles and more shots you took where the camera lens hopefully brought the shot into focus.
15. A little staging helps
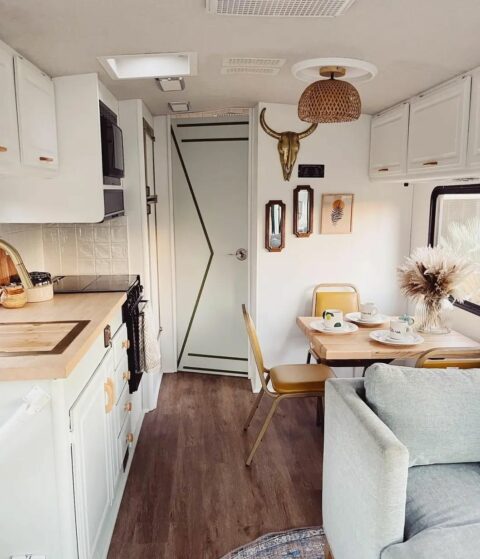
You don’t have to go crazy like you’re styling your space for the cover of a magazine, but a little staging can improve a space from ordinary and “lived in” to a show-stopping photo that everyone wants to share with their friends.
The best compliment you can receive about a renovated RV is when someone exclaims, “I can’t believe that space is actually an RV!”
An RV is not a house or an apartment. Even small studio apartments in New York City often have more walls to hang artwork. First-time RV owners often get frustrated when trying to decorate their space because they realize there’s just not a lot of walls, floor space or counters to place decorations.
That’s where you can help viewers imagine how they could make that space their own by staging your space with a few decorations and pillows.
You don’t want to clutter the few square inches of wall space with too many hanging decorations or photos, but whatever you do have on the walls, make sure they are straight and evenly spaced out.
Make your bed, fluff the pillows, add a cozy blanket to the couch. It doesn’t take much to make the space feel warm and welcoming.
If you’re struggling to come up with ideas on how to decorate or stage your space, obviously we have a lot of inspiration available here on this website and on our social media channels.
16. Use photo editing tools
Hopefully if you followed the advice in the tips listed above, you won’t have to spend too much time editing your photos after the photo shoot. But there are always little touch-ups to do like cropping, resizing or a little color correction to fix some lighting issues.
There are plenty of free photo editing apps and software to assist with resizing, cropping and editing photos prior to upload. And, of course, most cellphones can resize or crop photos that were taken with the phone’s camera app.
A few or our favorite photo editing apps:
- Adobe Lightroom (Android app / iOS app)
- Photoshop Express (Android app / iOS app)
- Snapseed (Android app / iOS app)
- GIMP (web-based)
- Canva (web-based)
- Paint.net (software download)
These apps are relatively intuitive for beginners but also include some advanced features.
Don’t be tempted to cover your photos with any filters. Editing lighting, exposure, saturation, etc. is fine in a tool like Adobe Lightroom, but don’t add any built-in filters from social media tools or other apps. Filters look amateur and may look like you’re trying to hide something.
Follow these simple photography tips and your photos will look great without spending excessive time editing using photo editing apps.

Ready to Sell Your RV?
Get your renovation in front of thousands of interested buyers in our marketplace.
Comments